Click, click, click
Played the Last of Us recently? Want to make your very own clicker mask?
Well I did and here’s how I went about doing it. I wasn’t going for an awesome high quality mask. But instead I wanted to make it out of easily obtainable materials. Something that anyone and everyone can tryout on their own. It took me only a few weekends to finish. And I only spent about $20-$30 (mostly on paint). All in all I’m very happy with the outcome and it has been a terribly fun and enjoyable experience!
Research, research, research.
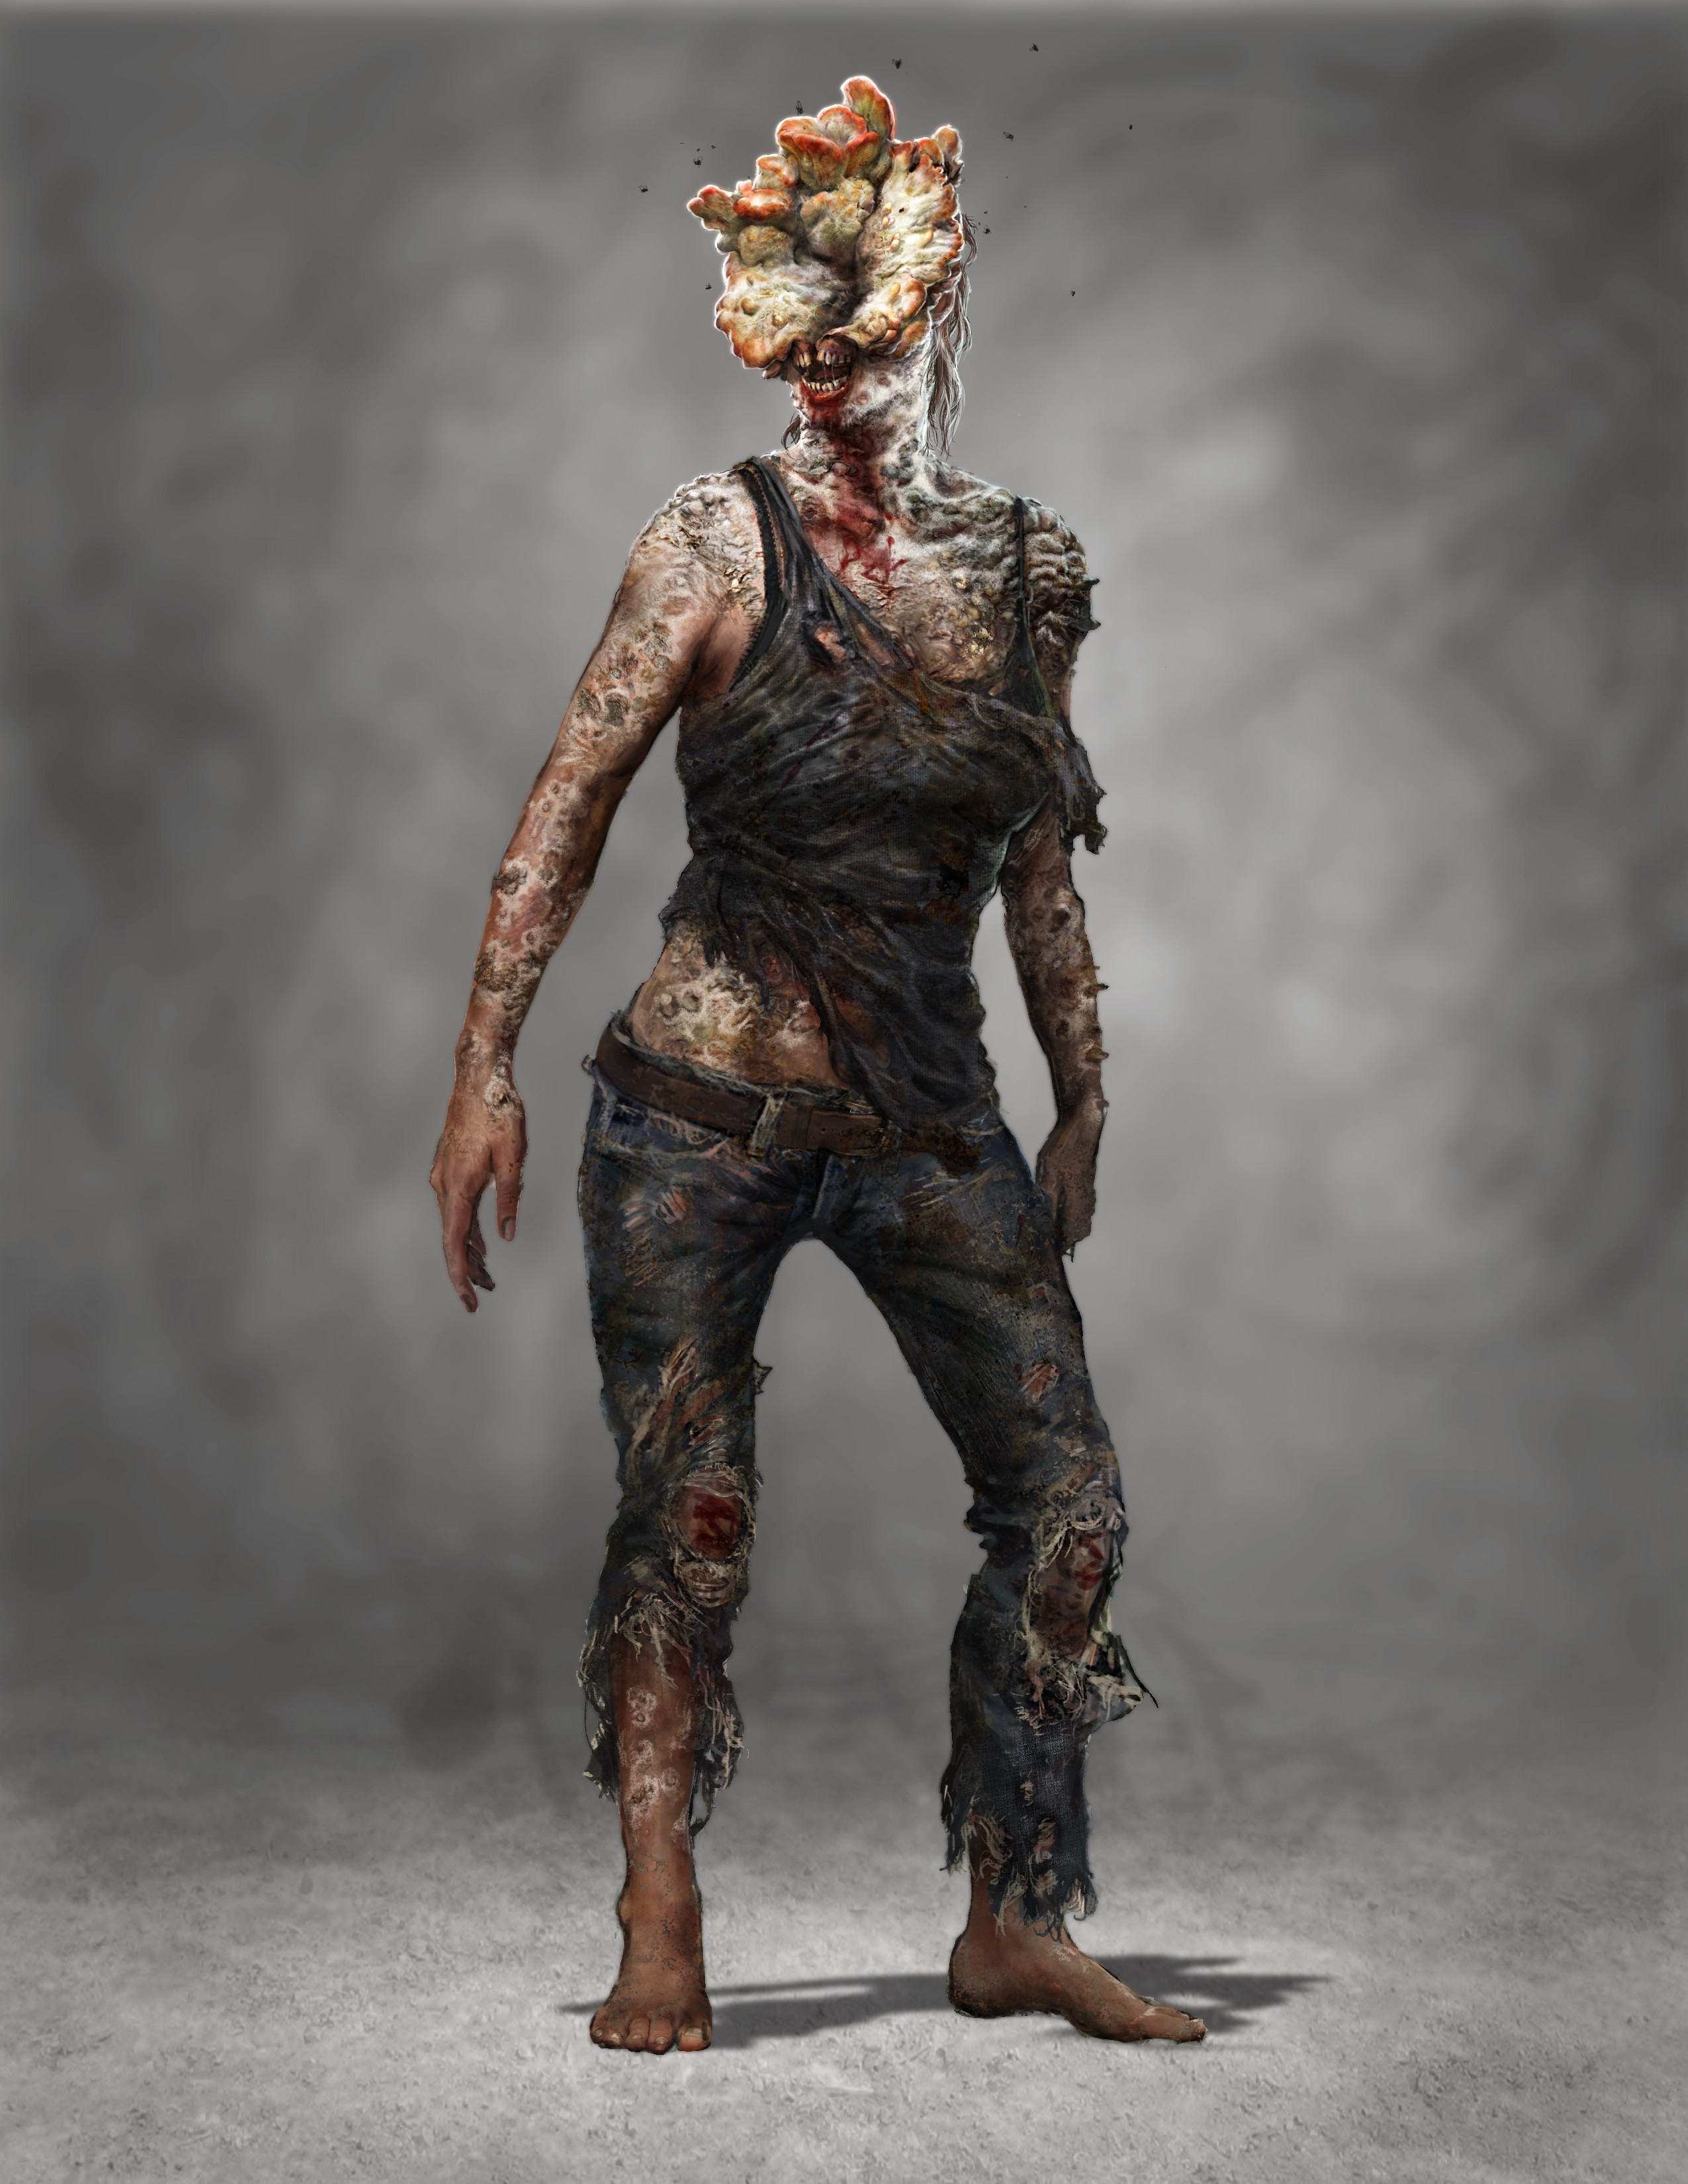
First I imagined that I’m in the postapocalyptic world where I had to defend myself against humans infected by a mutated strain of Cordyceps fungus! It’s REAL! And these zombie-like fungus controlled humans are SCARY!!!
So fungus controlled right? I went straight to google for cordyceps fungus…. But not much luck there
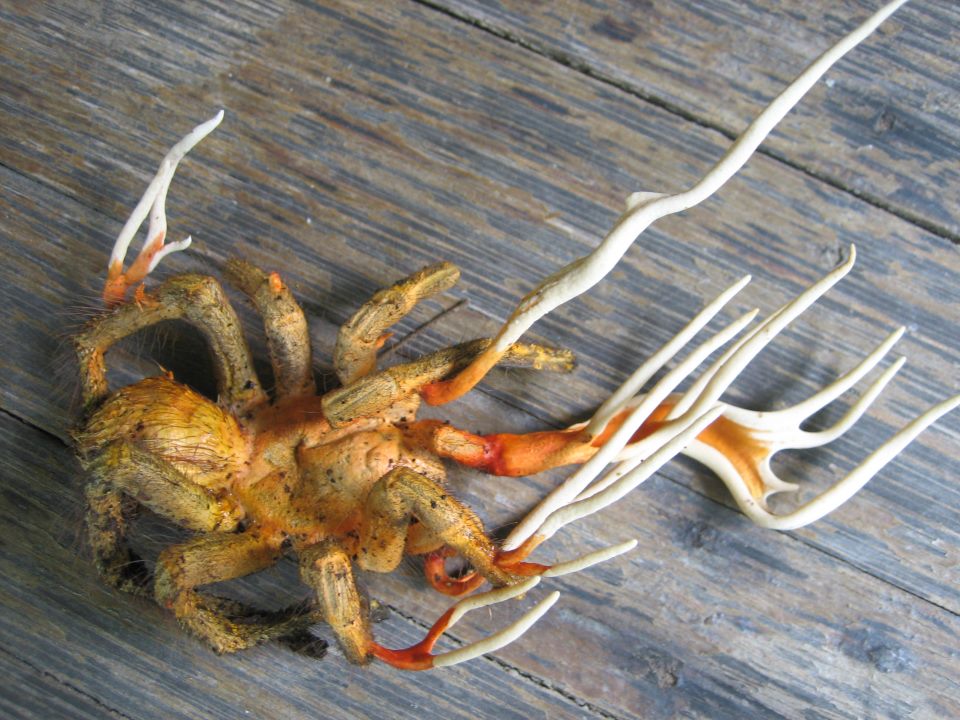
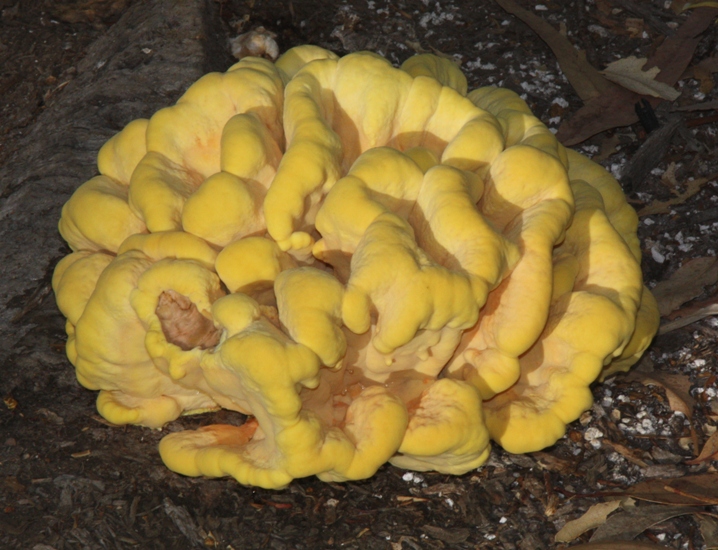
That doesn’t really look like a clicker. So what now? Just keep on digging. I found the yellow fungus fitted the way I imagined real life clickers to look like.

And of cause I took reference for the game art as well.
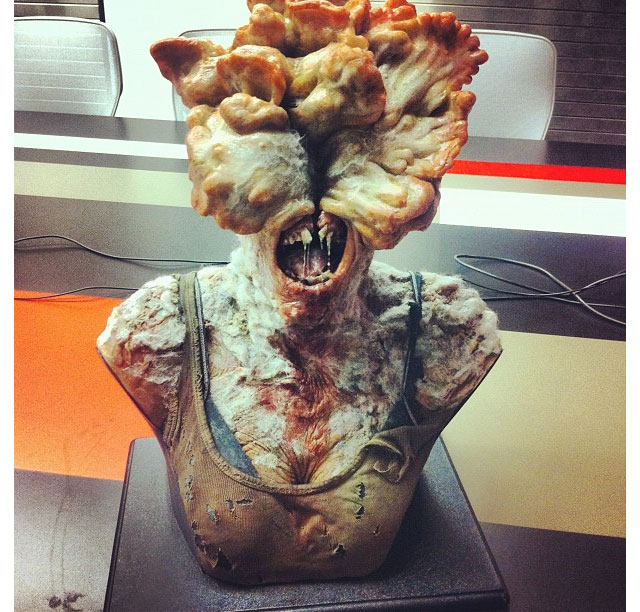
Not forgetting that other people have attempted making Clicker masks too…
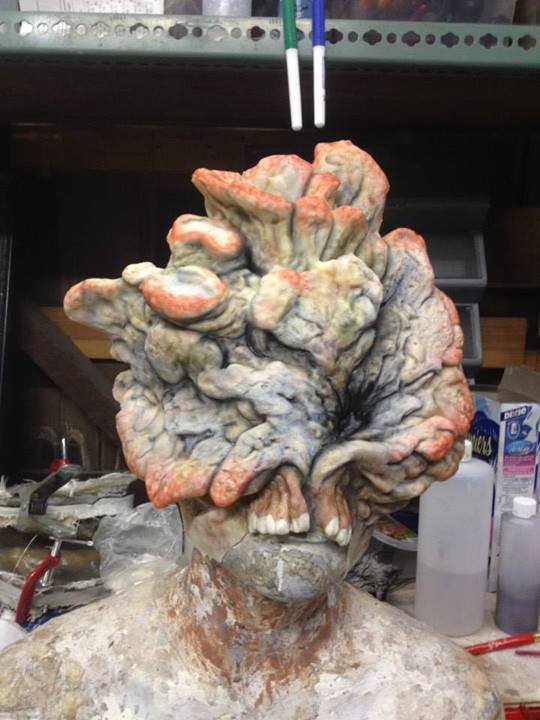
From the Mad Masker the person responsible for the masks used in live-action web series what remains. AWESOME STUFF *drools*
Gathering the Materials
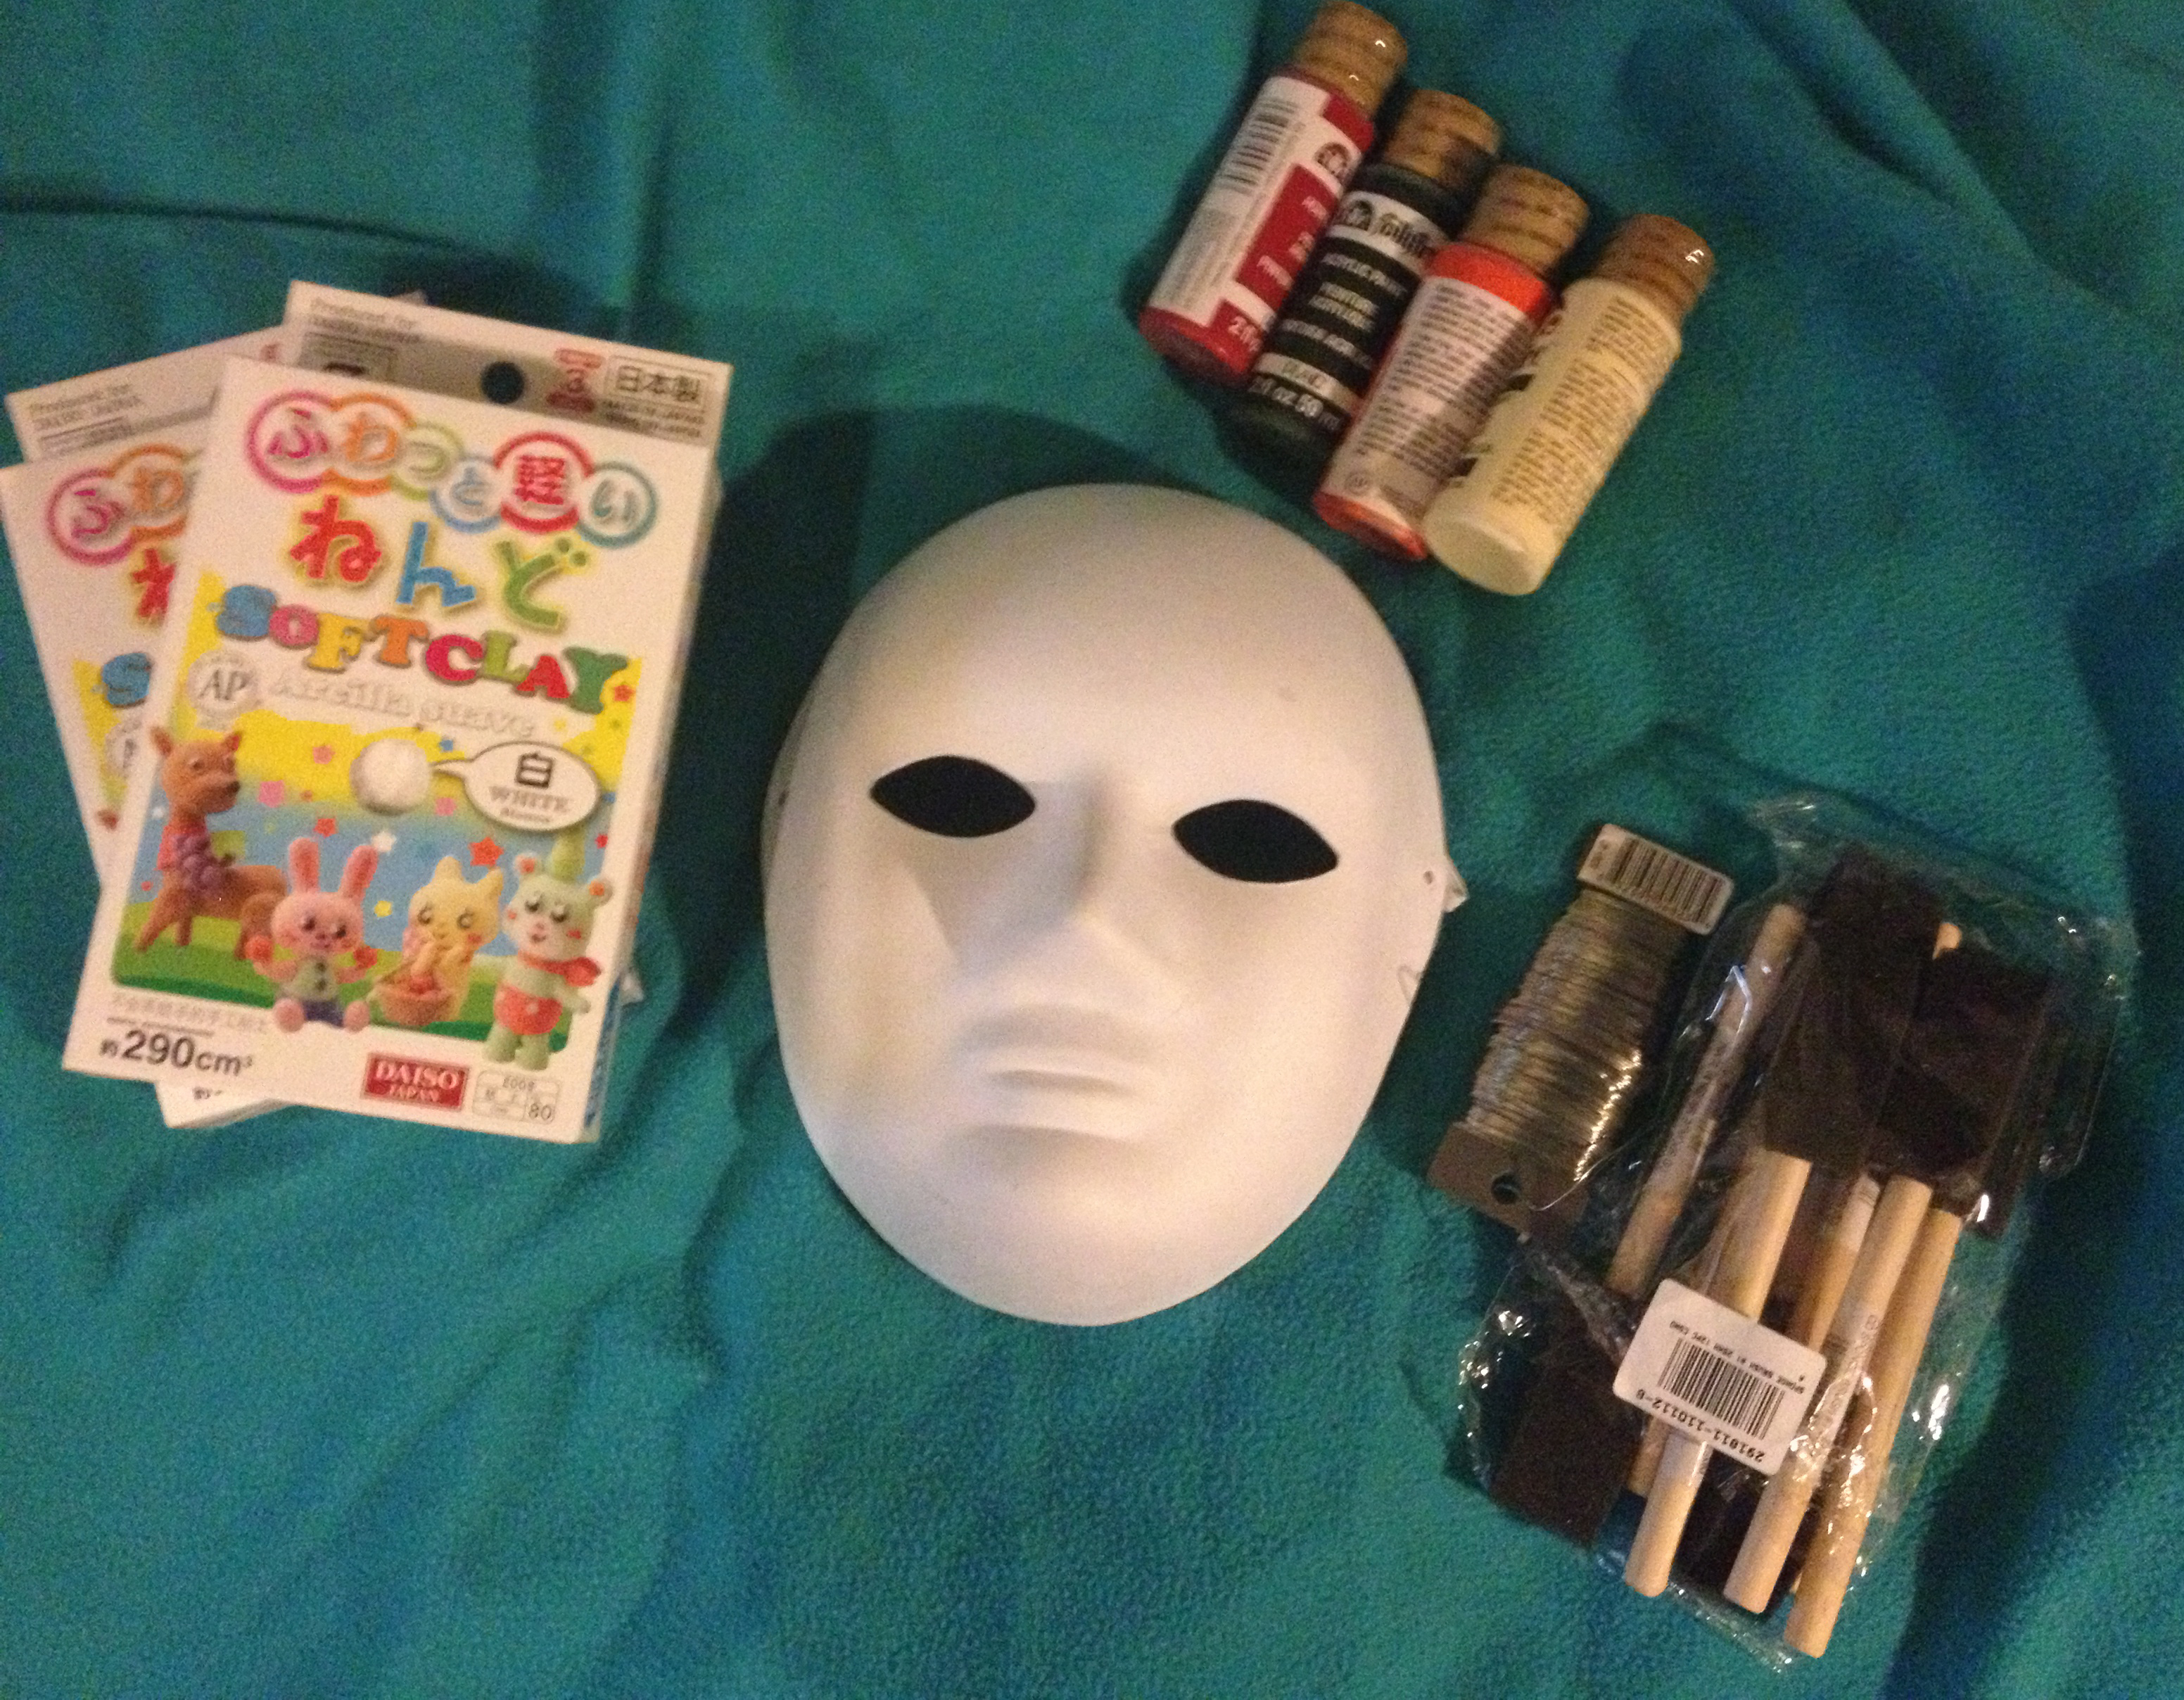
- 3 packs of Daiso Softclay. 1 pack is 230cm³ (I fell in love with Daiso’s $2 softclay which is paperclay. But any type of clay that’s easy to work with and dries will do. Not forgetting that it must be light aswell. If the mask is too heavy it might be hard to keep it on)
- Mask base (Needs a fully covered nose. So I bought the full face one and cut it later.)
- Wire ( Any soft wire that is easy to work with and bends and cuts easily will do.)
- Acrylic paint (Based the colors off reference images)
Let the crafting begin!
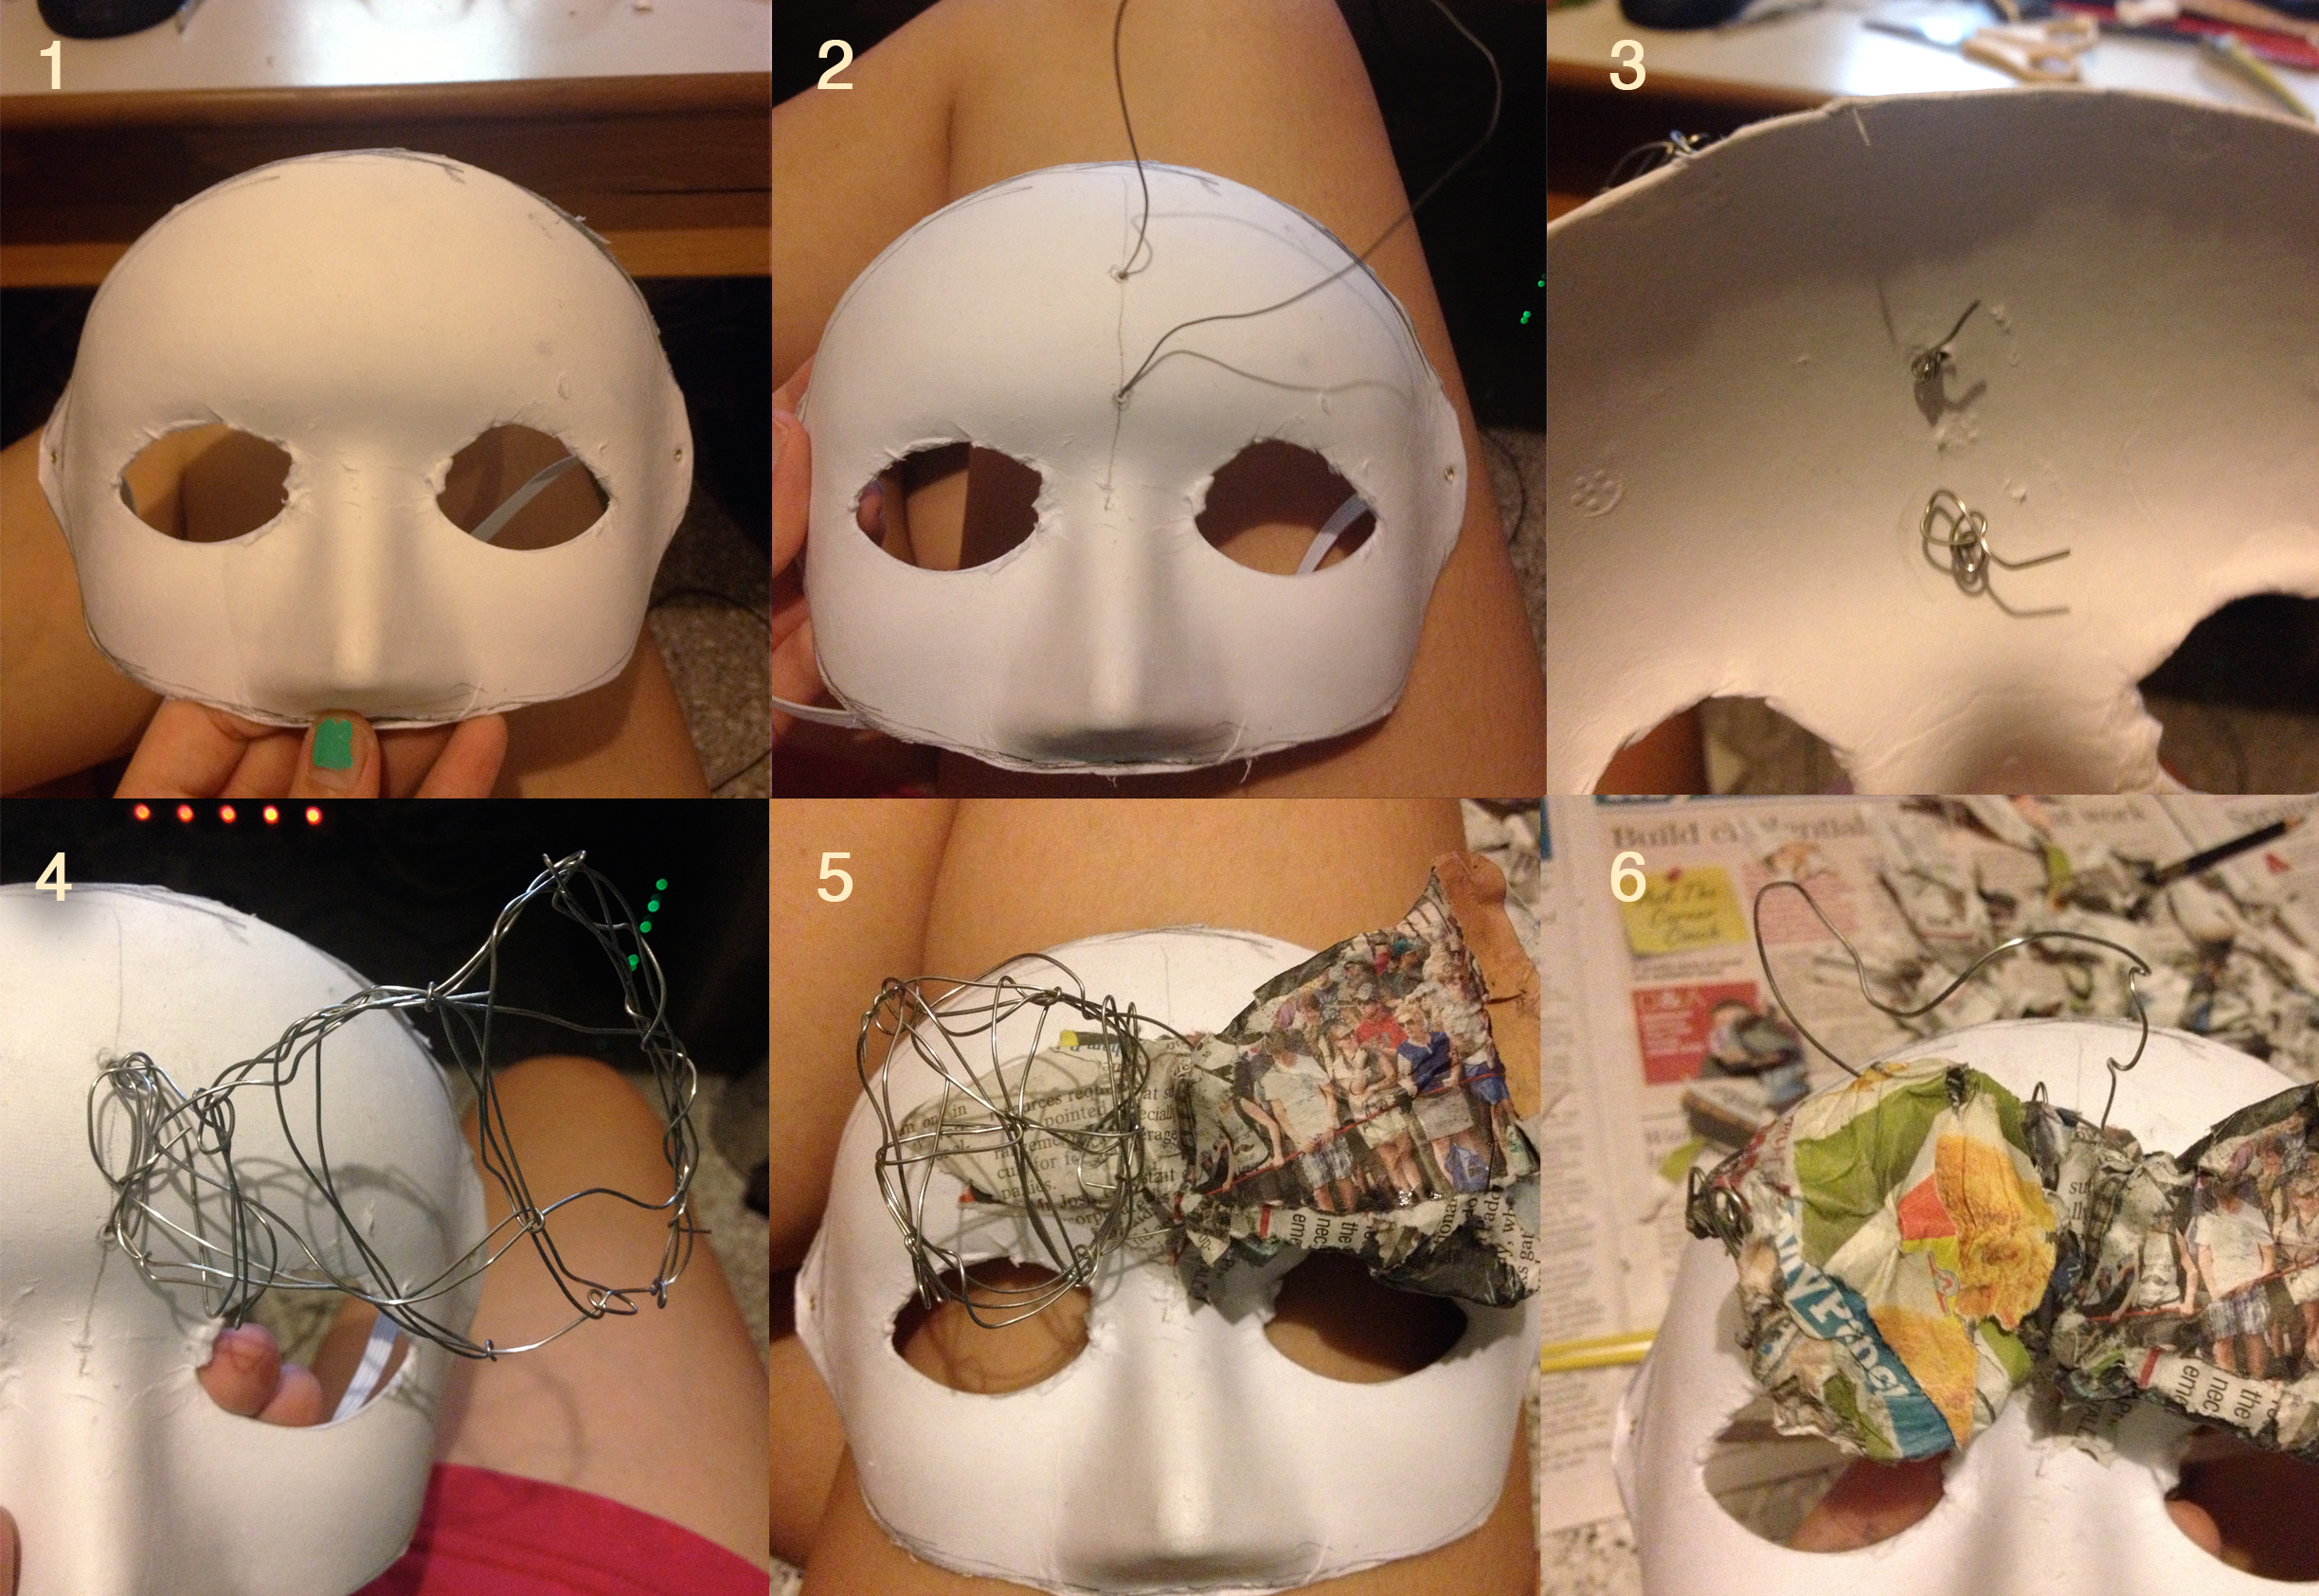
- Cut the mask to a smaller size, removing the mouth and chin area. I tried it on after I cut it and realized that the eyelids area was putting pressure on my eyes. So I cut that area too so that it fit comfortably on my face.
- Then I started making the wire base. I poked 2 pin holes in the mask and threaded the wire through.
- Made sure that the wire stayed in place by twisting them at the back. I used masking tape to cover the wire ends later.
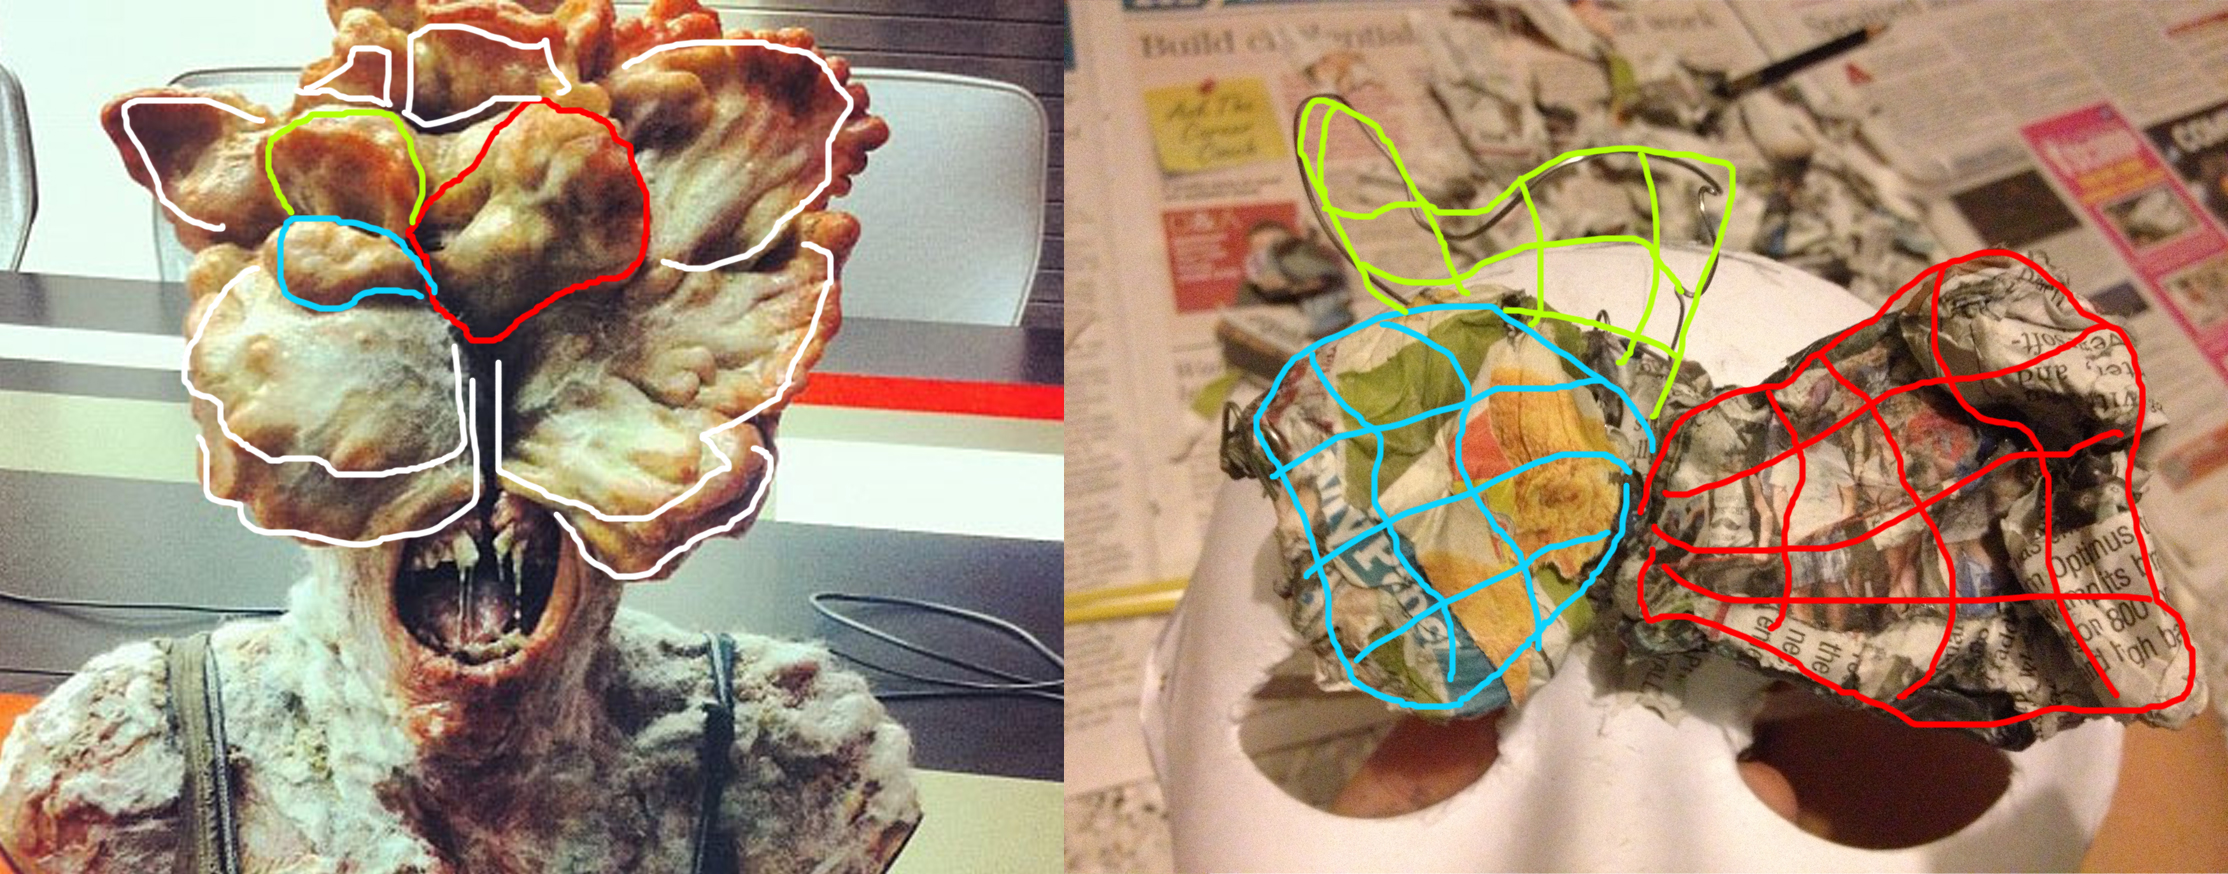
- The idea was to make one lobe of the fungus one shape at a time. I would make a net like wire frame like in the above image. This way I could get more shape out of each lobe.
5. Paper mached each lobe as I went.
6. When it dried, I adjusted the shape to better fit the reference.
7. Kept on going while keeping in mind how a fungus should look. Organic, wavy, fatter at the edges.
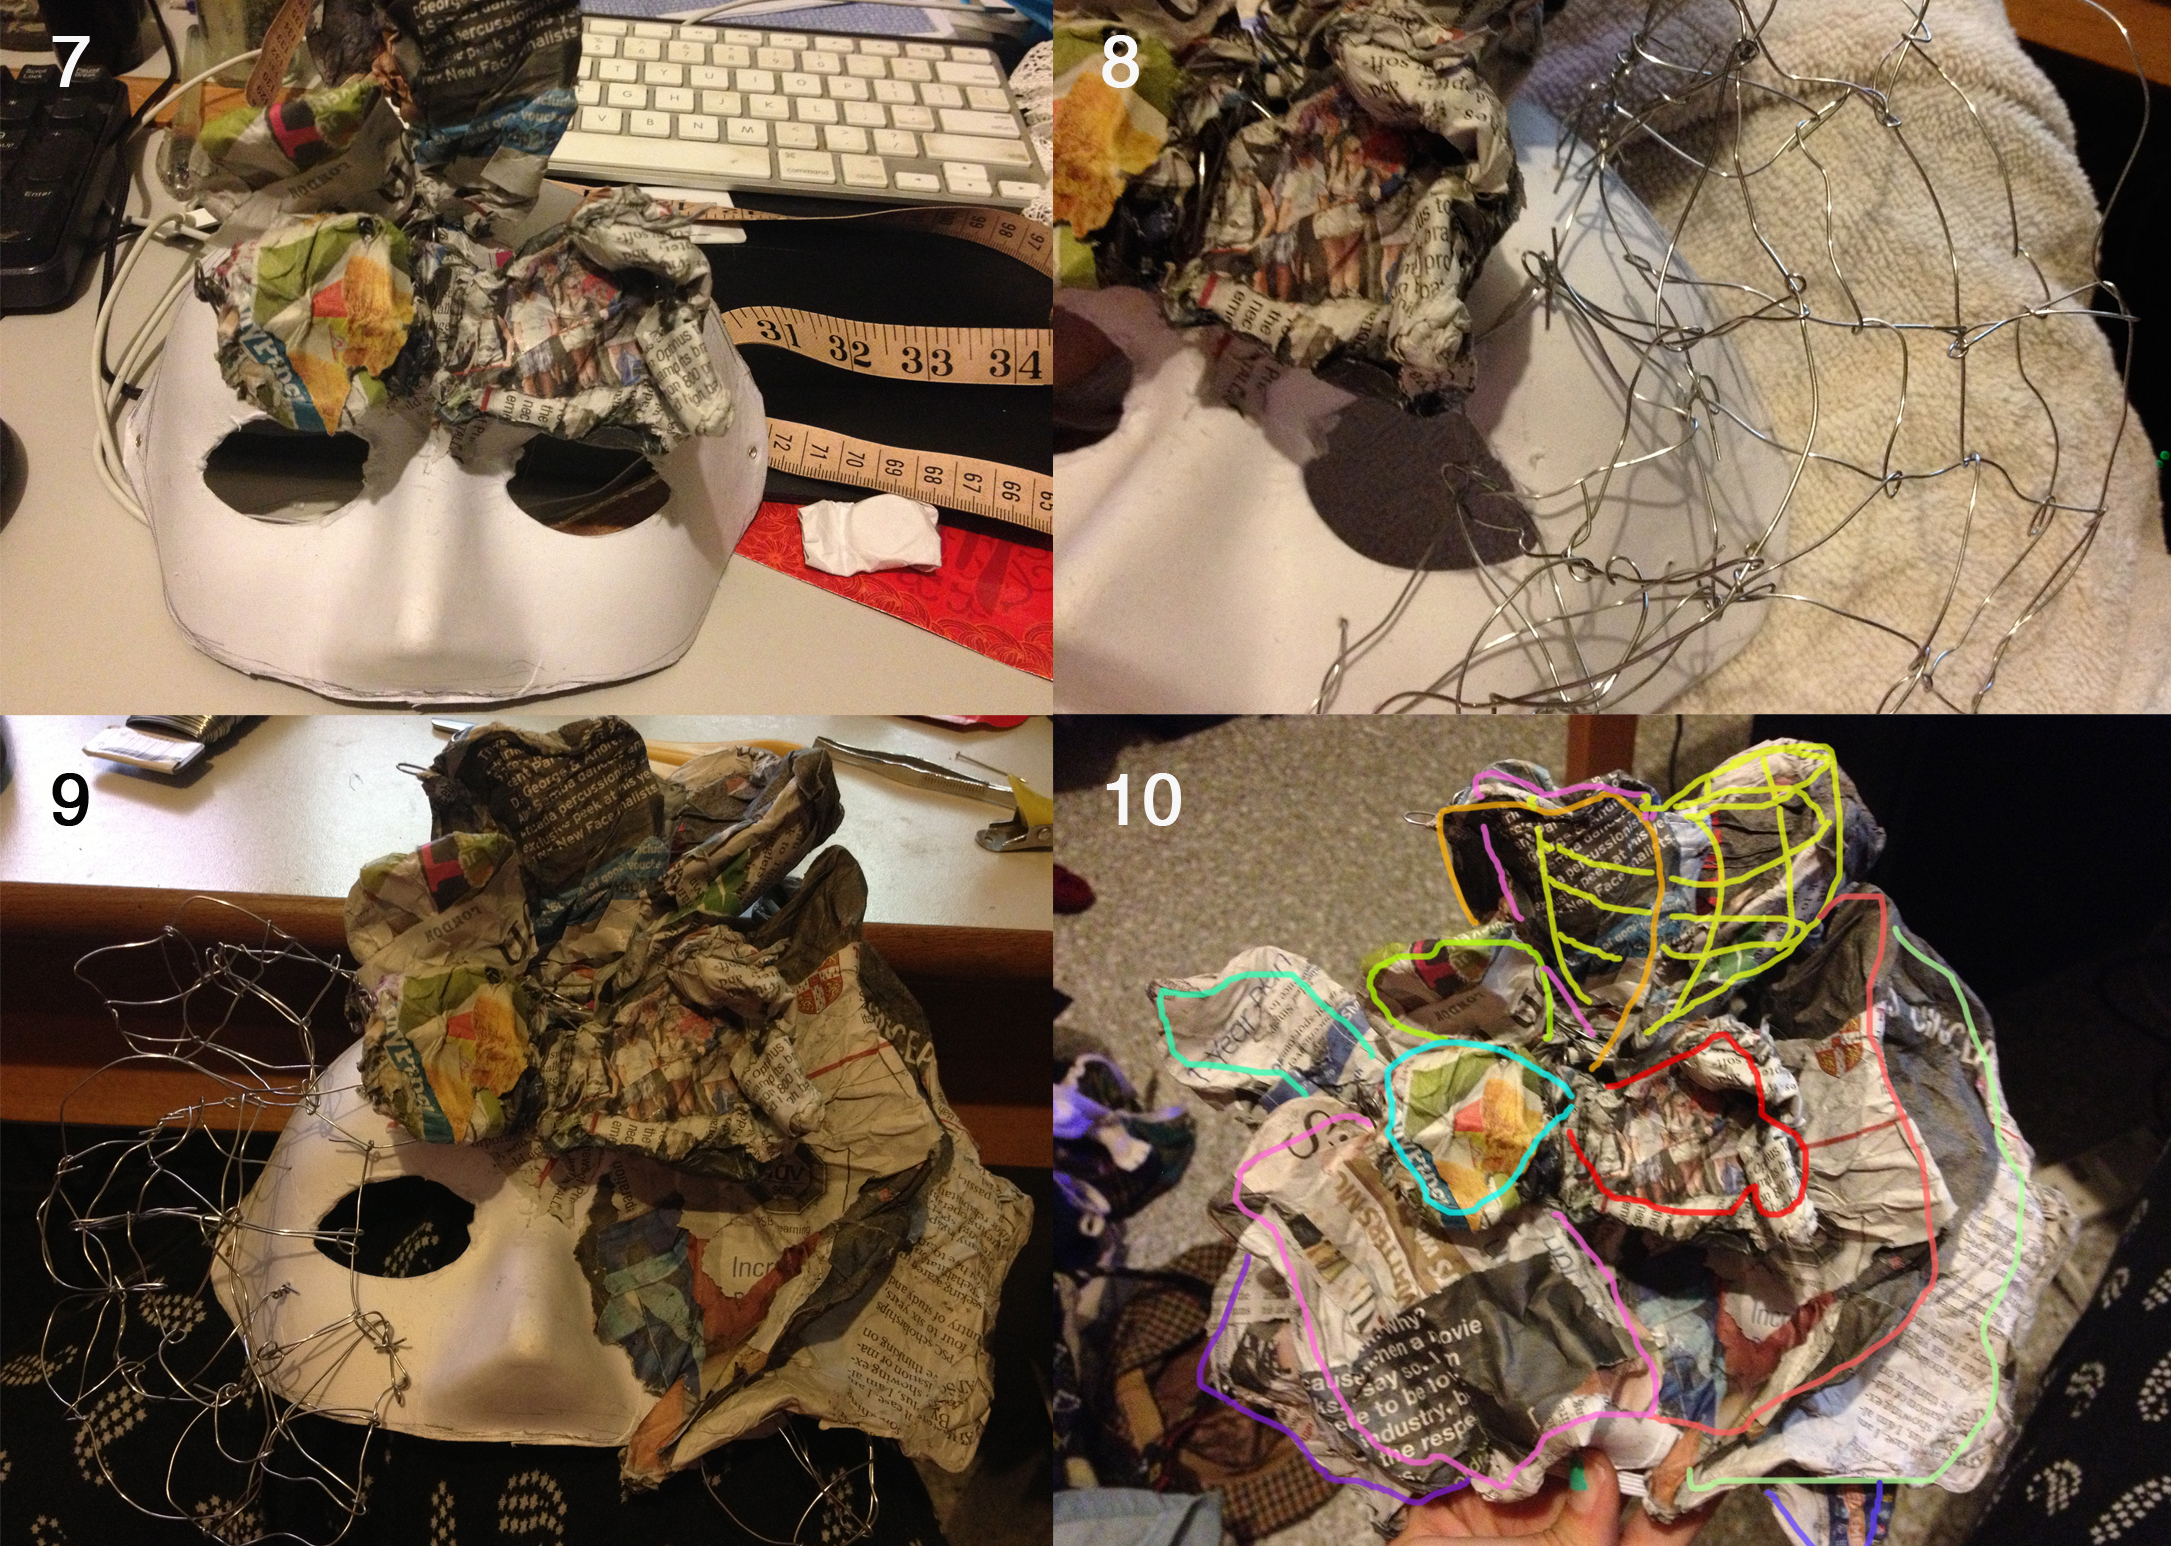
8. Made the bigger wire frame for the big flat characteristic right and left lobes of the female clickers. I went for 2 layers, bigger one behind and smaller one in front to give it a bit of volume.
9. Same thing for the left side however this one needed to include the nose. So I made a wire connecting from the right side of the nose to the left big lobe. This lets me cover the nose and give that effect that the fungus is bursting out of the face.
10. More paper marche and shape adjusting and it’s done! 13 lobes in total.
And what did I do once I used masking tape to cover up the wire ends and make it wearable?
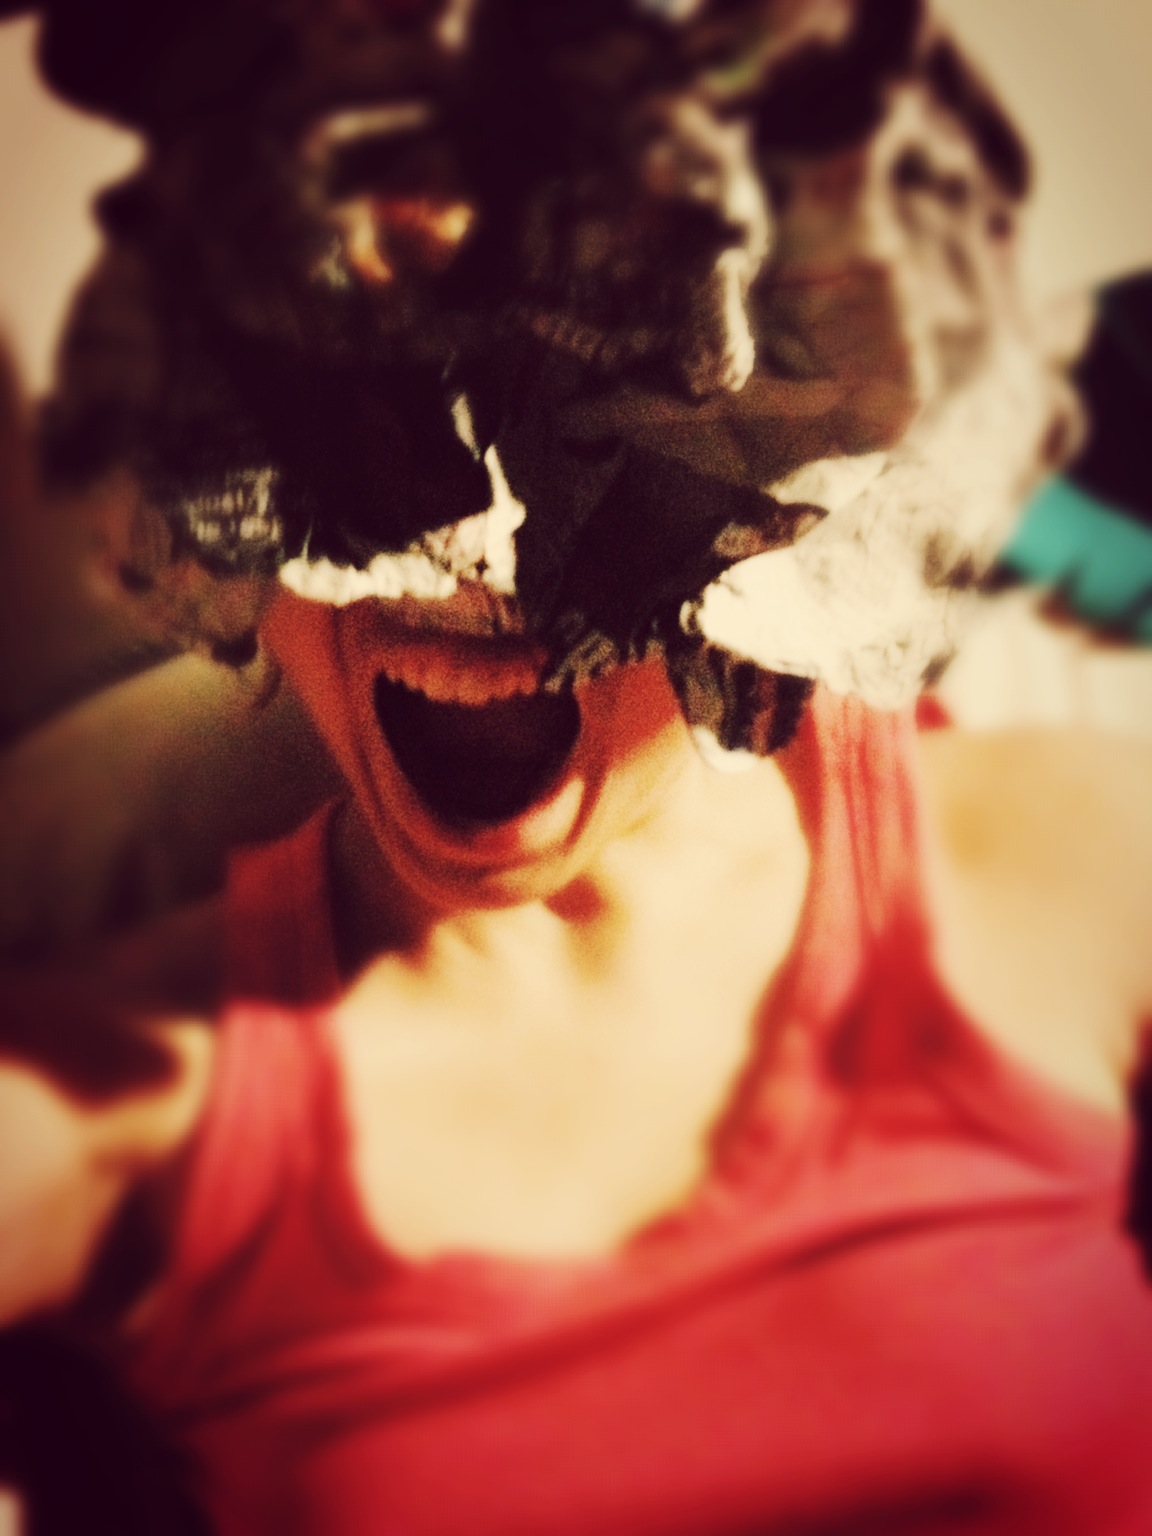
Growing the fungus.
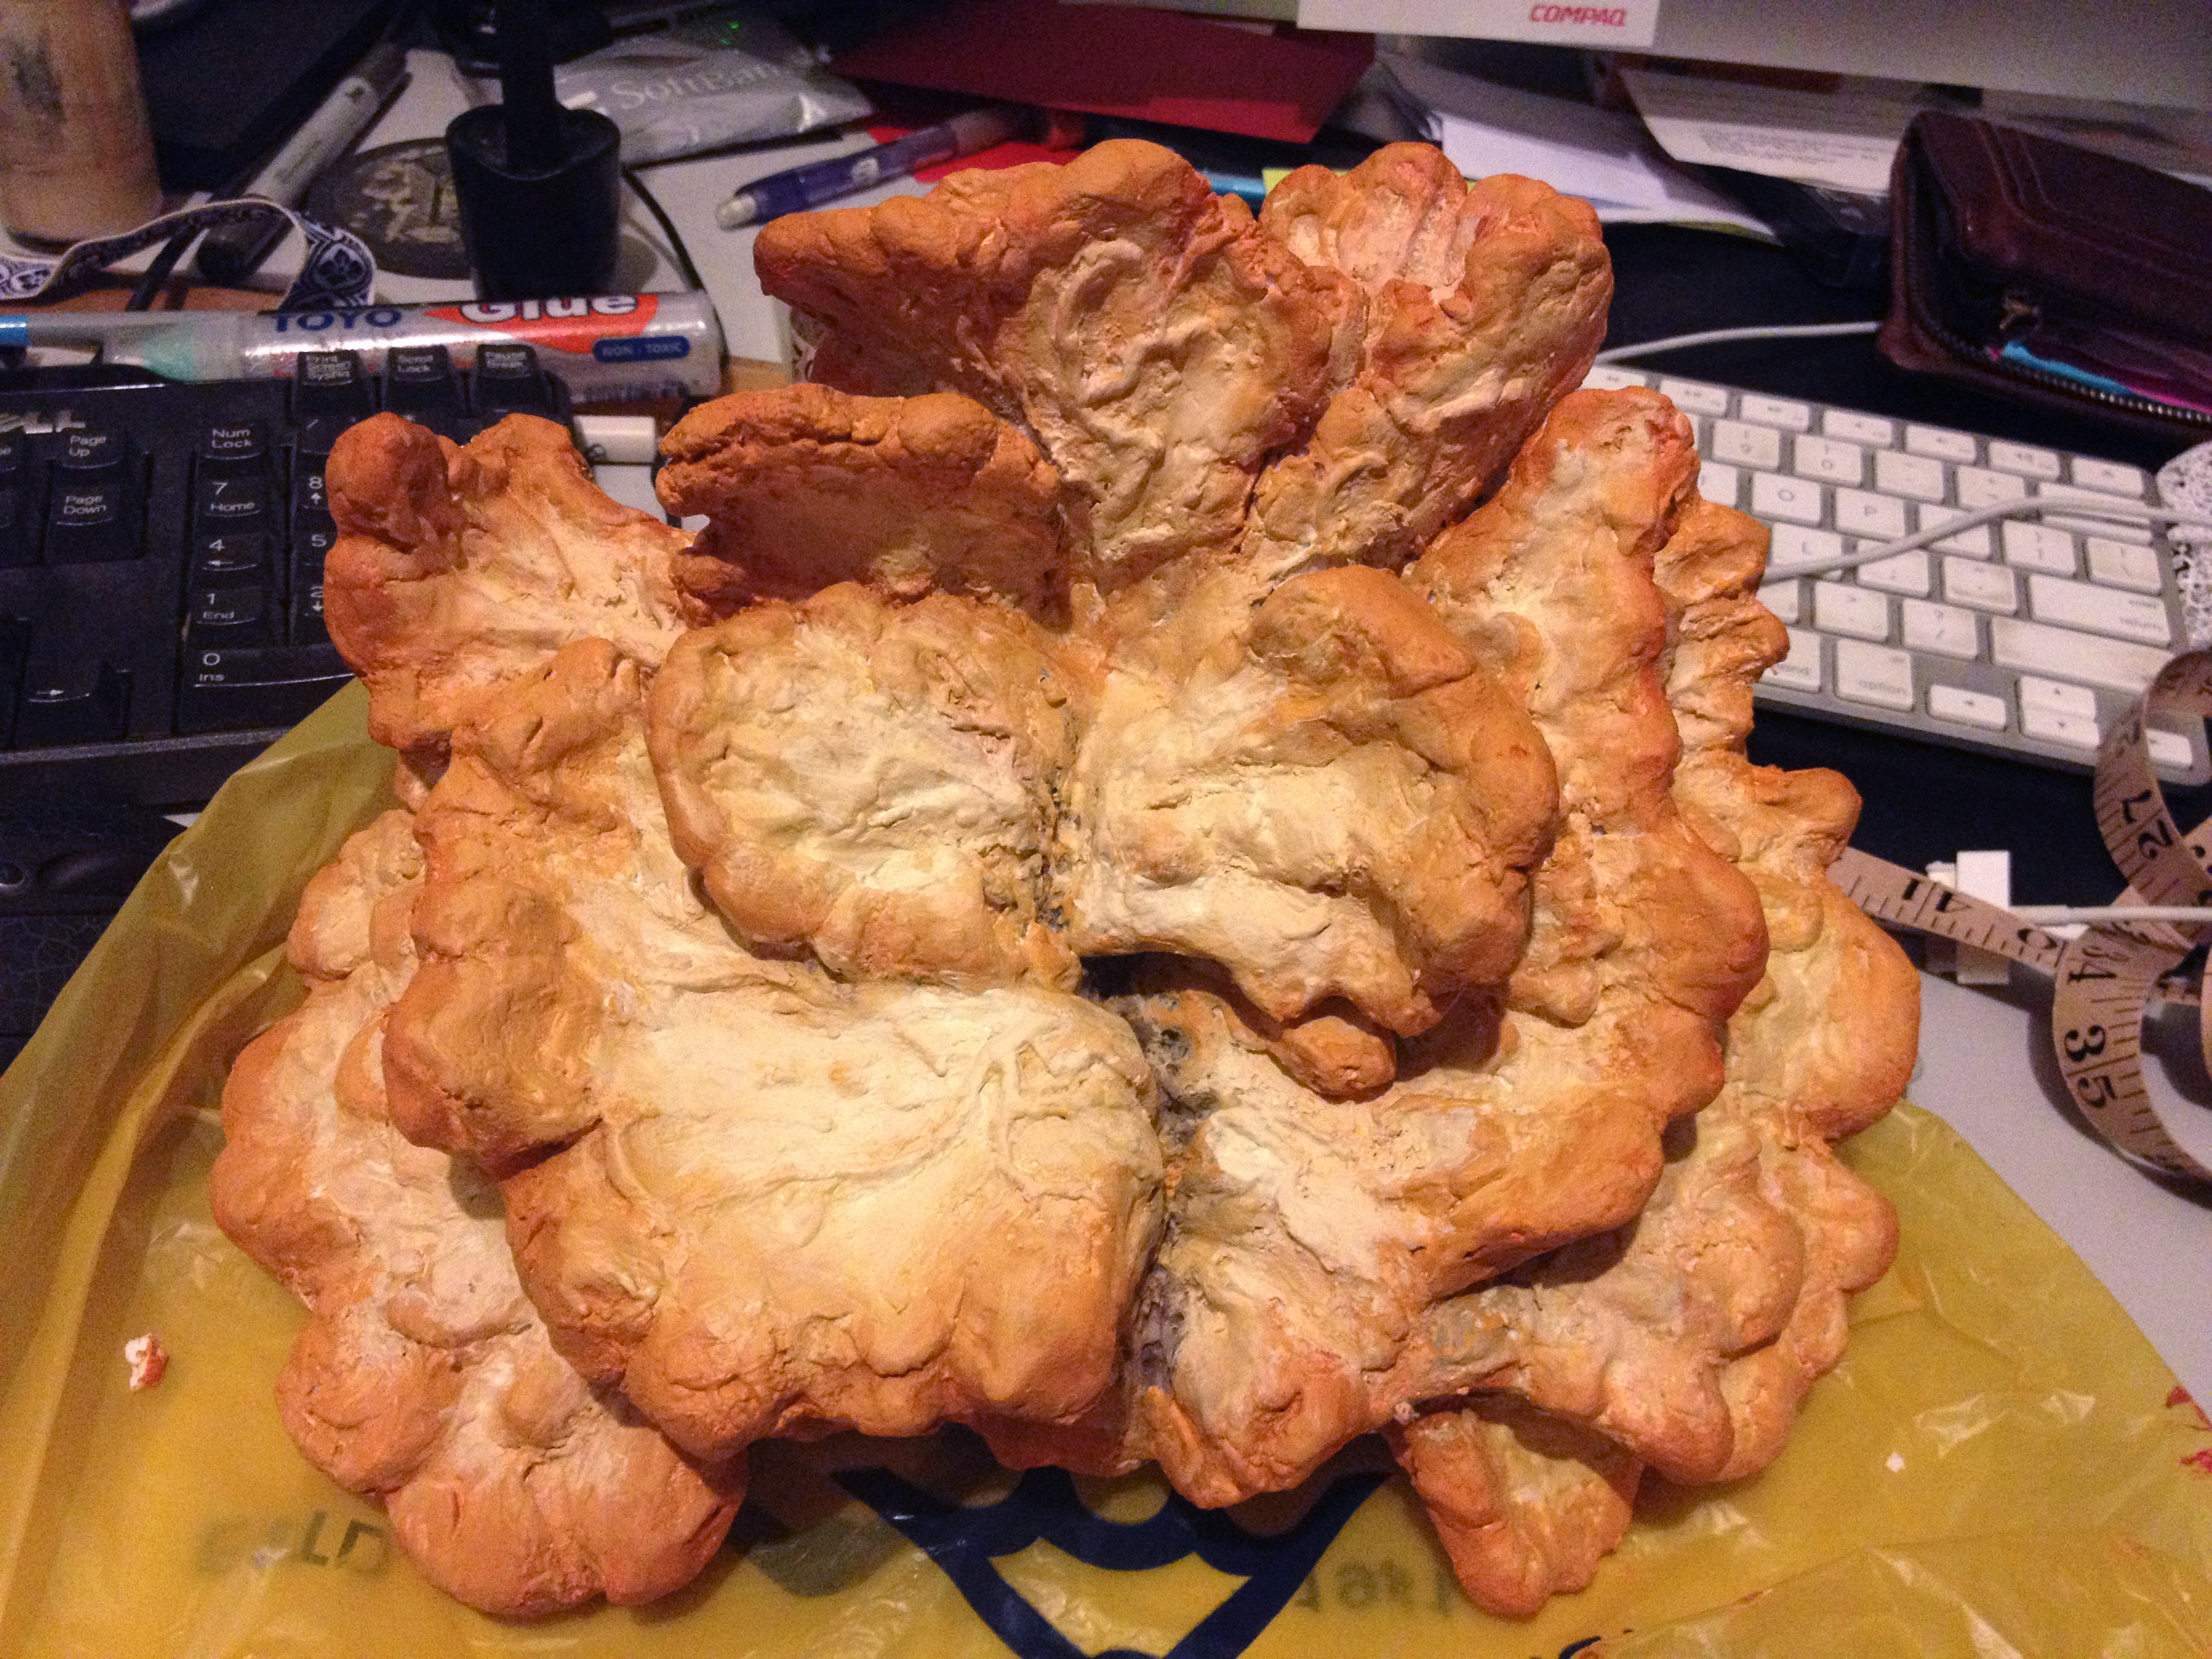
Now this part was really fun. I love the way Daiso’s softclay feels and shape. It dries at a rate that give you enough time to change your mind yet it’ll done drying the next morning. What’s more is that when it’s dry it’s still kinda soft, similar to styrofoam. Oh so mushroomy!!

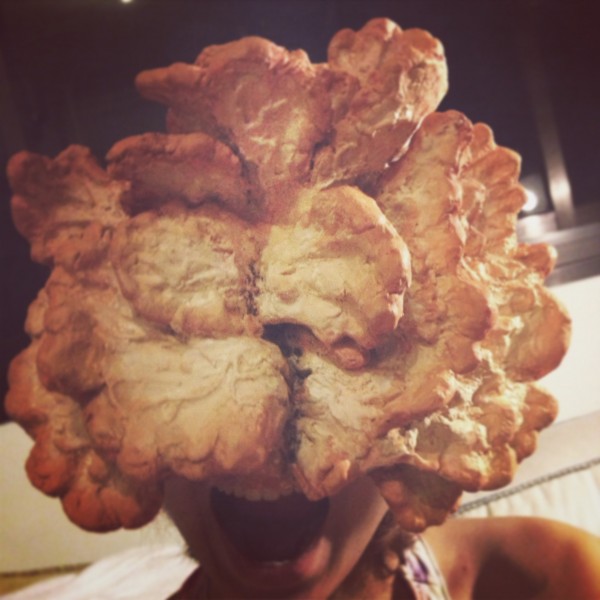
The above image explains most of this process. I just went about applying the clay and shaping the fungus. Kept the reference images in front on me and just went with my gut feeling. This is a very satisfying stage as I finally got to see it start looking like a real clicker mask. Adding in the little details like the veins was extremely fun as well. Not the easiest thing to do with the soft clay but I’m happy with the outcome. After it dried, I did a rough paint job. Didn’t really like the colours I bought as they looked a bit too luminescent and fake.
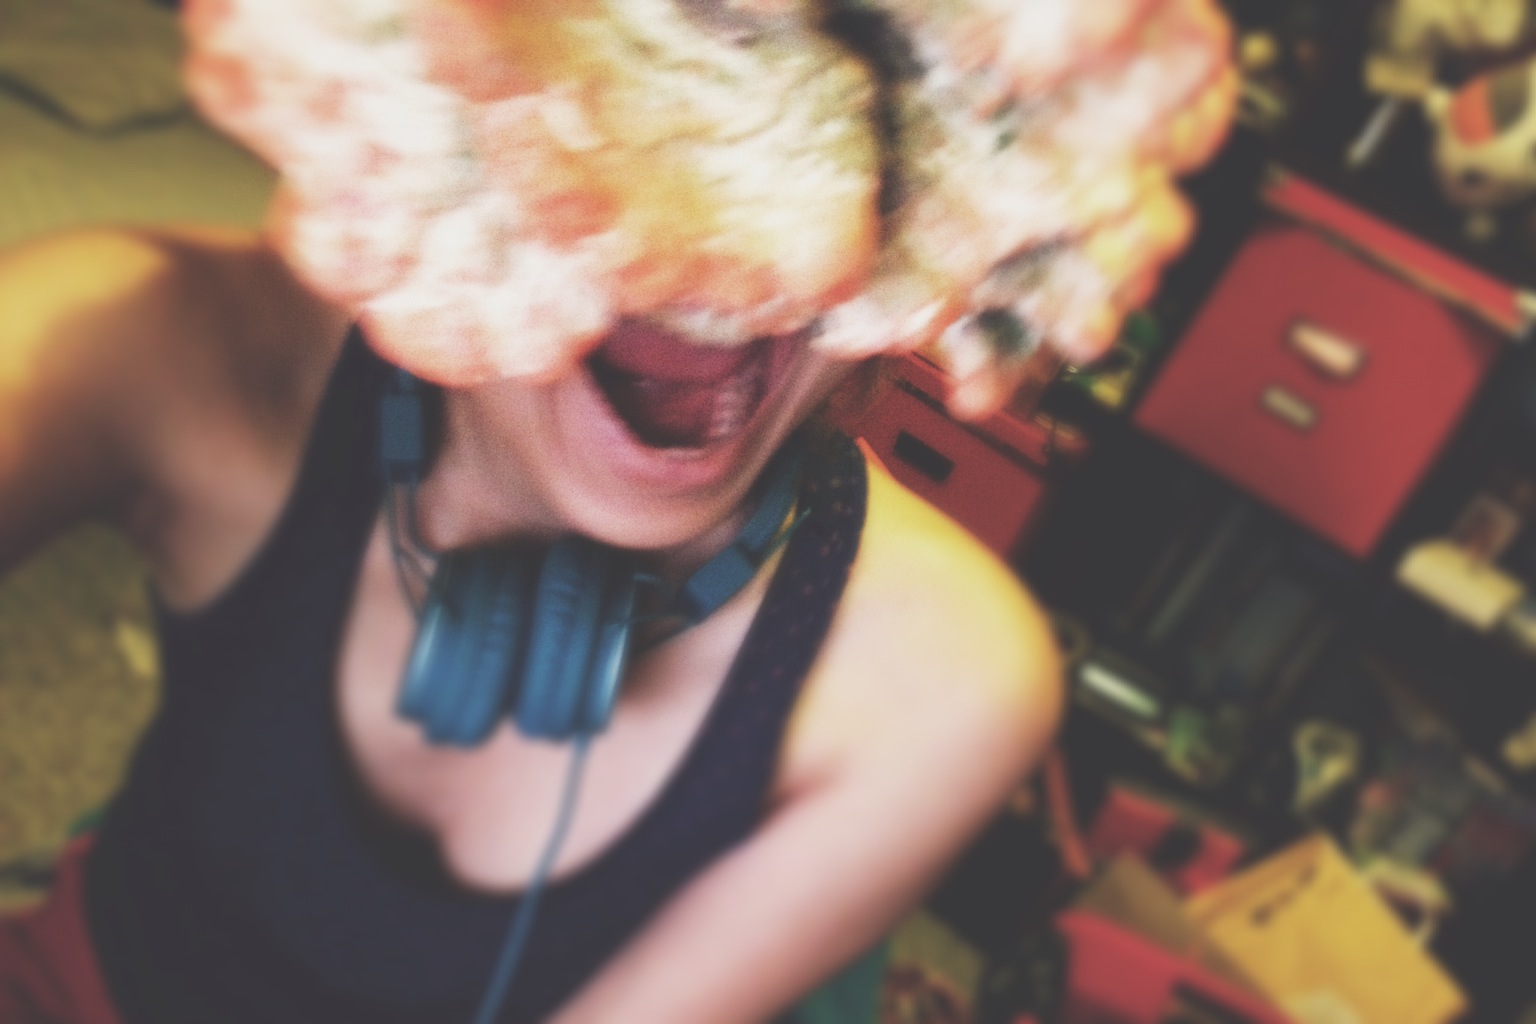
But it already could be used for awesome fun pictures!!!
I repainted it. Now it has a more down to earth color… But it’s starting to lose it’s nice white and orange contrast that the earlier paint had. I have yet to do another coat so far.

I’ll end the post with this for now. And will update the post when I’ve finished the mask and actually take it out for some real fun clicker action!
